
26 Feb 2009
15 Feb 2009
waktu seperti pintu taksi kuning yang menutup, dihitung dalam putaran roda
patients, prisoners, school students, the president, artisans herbs, creditors demons, erotic poet, the people, robber, male vocalist, prostitutes, activists, pastors .....
they all were waiting ...
Ketik sisanya disini
Read More......
4 Feb 2009
Carlos Marcos
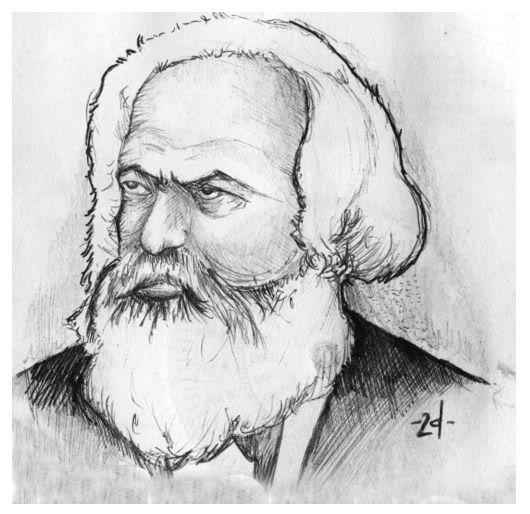
myhanddrawing carlos marcos
using 2B pencil on paper..
poor on the detail..
Ketik sisanya disini
Read More......
poor on the detail..
Ketik sisanya disini
Procedures For Pencil Portrait Sketching - The Slanted Head Pose
To craft interesting fluid portraits that breathe life you must appreciate the effect of the spine on the skull and shoulders.
To create a relaxed feeling in your portraits quite often you will need to render the skull slanted. Most people when they are at ease will pose with their skull slightly slanted. In this article we will point out what to look for and how to tackle the slanted skull.
In the slanted skull pose the subject will show a clear change of direction from the action of the torso to the slant of the skull. Also take note of where the shoulders are. The subject's shoulders will approximately be aligned with the base of the nose.
With this information in mind, the first step is to gauge the angle of the skull's slant (from the base of the chin to the top of the skull) before drawing the arabesque. To do this hold your pencil (or a knitting needle) at arm's length, closing one eye, and adjust the angle of the held pencil so that it corresponds to the angle of the slant. Keeping your arm straight and locked you can now transpose this angle onto the sketch.
Now that the angle of the slant is found you can draw the arabesque and validate the height/width proportion.
The axis of the features is vertical to the slanted facial angle. A common trend while drawing is to straighten out the features so that they are horizontal to the paper. Be on the lookout for this and ever on-guard because this trend is delicate and is constantly trying to sneak into the sketch.
It is not a recommended practice to establish all of the features at this time. It is actually more correct to first fix the brow line and the base of the nose and work from there.
When the skull is slanted you should also be aware of the effect that gravity has on the face. The flesh, in particular on the underside of the jaw, will be a bit pulled down. This effect is quite faint but for those of you who are advanced portraitists you should capture this in your initial arabesque. If you are a beginner just put this information away for future reference.
Take note, also, of the neck. The critical visible neck muscle is extended. Its companion is compressed. This opposing muscle action is referred to as abduction/adduction. This action of the neck always renders a striking effect.
Once the arabesque is positioned and you are satisfied with its accuracy relative to proportion and form you can draw the features and hatch-in the main big darks and lights. Keep the tone simple. The more complex the lighting arrangement, the more this applies.
The tonal arrangements are worked further, but are still a bit crude and unresolved. The main concern is the overall light effect.
There are a few items to keep in mind as you prepare to finalize the sketch:
1. Ask yourself how far you want to carry the sketch. You can get a real nice effect if you give the shoulders and upper torso an unresolved quality. Remember, drawings are not meant to resemble photographs.
2. As you gain a better understanding of the facial structure the trend exists to render what you know rather than what is actually there. So make sure you always pause to observe the life model or the subject in the photo.
In conclusion, the slanted skull pose is special in that the features will be centered on a slanted axis and that the stress in the shoulders will be different from one side to the other. Also the transition from the torso and shoulders to the skull should be carefully inspected.
Article Directory: http://www.articledashboard.com
Read More......
Tips On Pencil Portrait Sketching - Sketching A Chin Supporting Hand Together With Shoulders
Including a hand in your portraits adds a important measure of drama but can quickly ruin an otherwise fine portrait if done incorrectly.
The goal is to incorporate the hand so that it is not only proportionally and gestural correct, but is congruous in personality with the expression of the face.
For instance, an agreeable facial expression juxtaposed with a clenched fist may not yield the effect you want unless you intend to add an ironic twist to your portrait. On the other hand, a hand supporting the head fits very well with a stern scowling expression.
First, absolute novices should not be trying to render both the hand and portrait together. Things will quickly get muddled. The lesson for the absolute novice here is to get an appreciation of the significance of acquiring a solid foundation of your skill.
In a view where a hand supports the head there is a faint forward tilt because the subject is slightly hunched and leaning forward. For the draftsperson, this situation translates into the presence of a delicately foreshortened and reclined portrait. In the hand/head case this means that the chin is slightly receding relative to the forehead.
As always, you should start with the construct, which in this situation, includes the hand and the shoulder. If you first render the head and then attach the hand to it you are definitely asking for trouble. The hand and the head will lack cohesion and will give the awkward impression that they are two distinct objects that are coincidentally next to each other.
When sketching the complete arabesque be aware of the negative as well as the positive spaces. Also, do not pre-measure any aspects of the complete arabesque. It should be sketched with as much flair as possible without losing your sense of proportion. Draw first then verify.
Further build upon the complete arabesque by placing the face, hand, and shoulder signpost
s and sizes. The internal architecture of the complete arabesque is initiated by hatching-in the chiefdarks and painting out the lights with a kneaded eraser.
What you are doing is to set the stage for drawing the facial features, the hand, and the shoulder. The hand must be placed and sized in accordance with the head and the facial features. The compression of the jaw into the palm must also be reckoned with.
Making use of a sharp pencil you can now further develop the value and shape with hatiching, stumping down, and painting out. In this, you will be going back and forth hoping that you know when to stop. Rendering is about making decisions, i.e., knowing what to build up and, just as essential, knowing what to leave out.
In the hand/head situation you have to be extra careful how far you develop the hand. The hand should be seen as an extra element, that is, a supporting element that should not be part of the focus. Do not feel compelled to finish every element in your drawing. Everything in rendering is about equilibrium and transferring your meaning directly to the viewer's eye.
In closing, it is important to see the hand and the shoulder as parts of one whole. Starting your drawing with drawing the complete arabesque will help you greatly with maintaining this cohesion. Treat the hand and shoulder as props that surround the face. This means that you should render them in a subordinate role.
Langganan:
Postingan (Atom)